

|
Started |
: |
Januare 1st, 2004 |
|
Finished |
: |
January 20th, 2004 |
|
Base |
: |
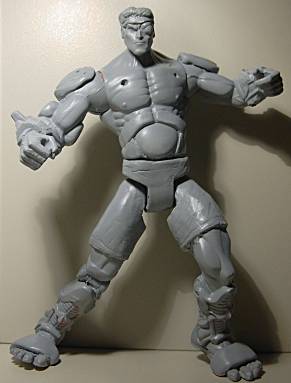
"Martial Arts He-Man" |
|
Parts |
: |
- |
|
Materials |
: |
Revell Paint,
Fimo, |
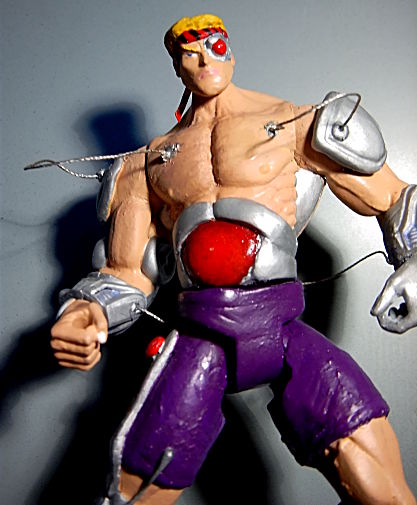


Character & Intent
Robotic Artificial Exoskeleton. RAX.
Once a human kickboxing champion, the man simply
known as Coswell found himself confronted with the
harsh truth of a world that was no longer interested
in merely human sports. Instead, the public eye turned
towards much more spectacular and violent cyborg
battles. Being a martial artist through and through,
he had no other choice than betraying his own
ideal by sputting himself through the humiliating
process of cybernetic implantation. And still,
his fate remained cruel, as his promoter had
put money on RAX' loss in an important
match and shut him down via an
implantated virus.
Enter... The Eternal Champions contest.
This custom was a fun one to make.
While it was hard to find the base figure (as most
stores in my area are in the process of dropping
the current Masters line), I went lucky in the end
when I found a few Martial Arts He-Man on
the pegs - It was almost perfect ! The bracelets
and wristguards made an excellent base not
only to duplicate, but also to expand the details
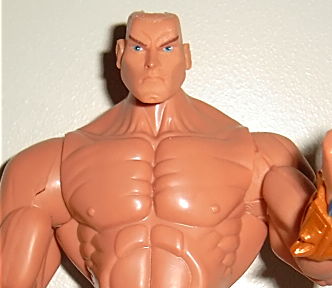
of Rax' implants. The face was dead-on, as
well.
One problem with this figure was the fact
that Rax is being portrayed a bit inconsistently
in the actual games - Some of his implants switch
places several times from title screen to selection
screen to the game itself. For the sake of my own
mental health, I decided to go with the in-game
look, taking a few liberties and incorperating
elements of the base figure sculpt along
the way.
In the end, I think I suceeded with this figure.
The likeness is pretty good, and - apart
from a few crummy spots, the overall
appearance is fairly convining. I'd say
it's my best Eternal Champions
custom so far and part of my
personal top five.
Creation
After ripping He-Man's hair away from his
head and wondering why I was suddenly
holding a very buff Charles Xavier, I
started
the irreversable changes by removing the
loincloth (nothing spectacular underneath !)
and dremeling my way into his eternian viscera
to insert the glass pearl with the aid of some
hot glue.
Next up, I cut some of the rather pointless
pointy parts off of his bracelet and dremeled the
equally pointed tops of the shinguards away.
The following step was a rather cruel one, as
I rammed a knife into his skull and cut the area
around his left eye out of his face. It was a rather
surreal moment. Here I was, starring at the mangled
face of the first actual He-Man I had owned since
my childhood while one of his eyes was starring
back at me from the table.
Yet, I had no time for such therapy-inducing thoughts...
I had to sculpt !
Of course I could not let the poor little guy
lie around with a whole in his face - He
would only have a gotten a headcold !
(Yes, Ladies anf Gentlemen, marvel at
this prime expample of horrible pun-etry)
The implant is a mixture of Efa Plast and the
tip of one of my loyal ALs for the artificial
eye. The headband is Efa Plast, as well,
just like his hair. Originally, I had planned
on simply cutting the figure's orginal hair,
but I had to abandon that idea when I
realized how much that would have
looked like a classical Dr. Octopus
bowl cut.
Another intend that didn't quite go like planned
was added articulation for the right leg. I had
figured that it would be fairly easy to add as I
wouldn't have to make the joint look natural.
The joint I had chosen used to be the legs
of a Lego figure, cut in half. With some drilling
and lots of hot glue, I suceeded in inserting the
new joint.
What I had not considered was the fact that this
figure was far heavier than anything the joint had
ever been made to hold up. As you have probably
guessed, this "knee" got very loose very fast, but
with the aid of some more glue, it does an
acceptable job holding up the figure.
Of course it still needed some sculpting
around it to look like it was supposed
to be, and Efa Plast did the trick
pretty well.
More of that material was used to create the
metallic rings in the lower abdomen area
(whatever those might be), to expand some
parts of the bracelets and cover holes in
those as well as to expand the right shin-
guard to have it meet up with the knee
joint.
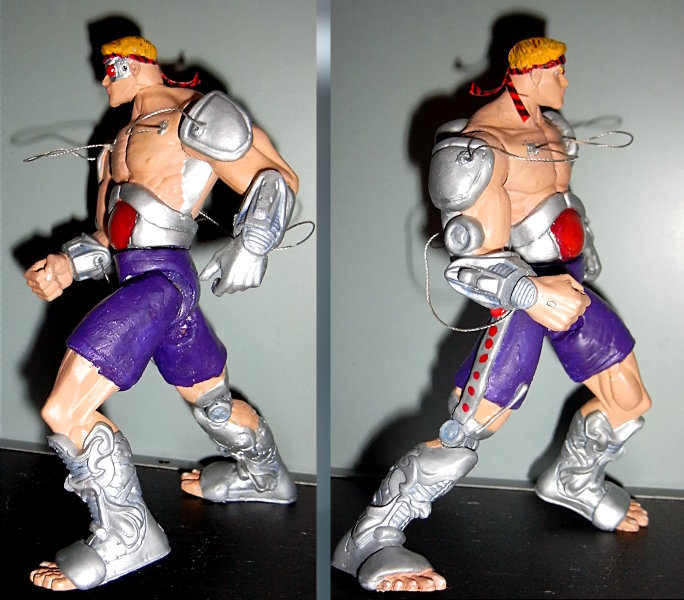
The boxer shorts (literaly !) are made
from Das Pronto, as I favor it for large
structures void of details.
The shoulderpads, backpads and joints
screws of the right arm are made from Fimo.
I sculpted them onto the body, removed them
for baking and finally glued them back in place.
A rather tedious process, but it worked.
The toes are made from the same material.
They're actually duplicated from Skeletor's.
I had made a primitive mold (out of Fimo,
as well) beforehand and only needed to
correct some details such as the claw-like
nails before backing them and glueing them
on where the original boots had been before I
butchered them. You might have noticed
that I have tried to put the toes into Rax'
original fighting stance. Like said, I tried.
But the original design had still been
friendly towards me, as I could easily
cover the seam up with the footplates.
After drilling the holes for the wires,
it was priming time ! Why, you ask ?
Because it would not have been smart
to prime with the wires already inserted.
 After Priming |
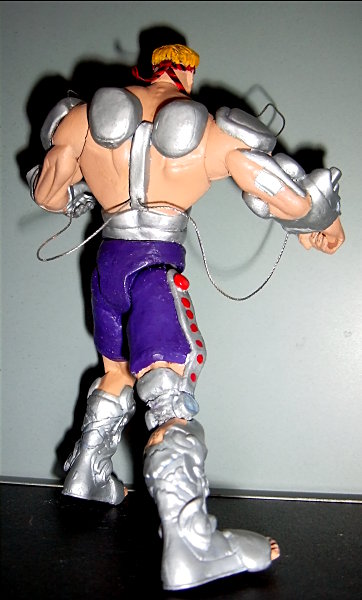
The wires are real wires and hell if I remember where
I got those. Anyway, they were glued into the afore-
mentioned holes (or "plugs", if you will). Afterwards,
I sculpted the spinal... rod. bar. thingy. Whatever
it may be, it was sculpted over the spot where the
wrist wires connect to the back. I find it amazing
that Efa plast does not break away despite of
the wires, by the way. The same material
was used yet again for the thing on the
side of the right leg (If I had to guess
what that is supposed to be, I'd
say "Christmas Decoration")
while the cable in front
is hot glue.
The ensuing paint job took over four days.
Things to remark about it:
While I had worked with Revell silver paint
before, I had never been quite satisfied with
it. So this time around, I purchased some
Fimo silver powder and mixed good ammounts
of it into the paint. The results were quite satis-
fying, as the paint now appeared indeed more
metallic and not as "flat" as before.
Encouraged by this, I also put some of that powder
into some blue marabu paint and deluted the mix-
ture with a lot of water to make a wash for some
of the "implant's" details. Worked well.
Finally, I mixed even more silver powder into
some Revell glow-in-the-dark paint and
drybrushed some of the metallic highlights
with it. Rather pointless, I know, but
it is still a nice touch.
Another wash, this time brown, was applied
to the hair to bring out the details. This one
had been applied before the actual paint,
as Marabu paint doesn't provide the best
of surfaces for this treatment.
Final note on paint:
I had to make corrections to those
details waaaaaayyyy to often.
The last part of the customzing process before
sealing the figure up with clear laque was cutting
some strips from a red balloon (the other 98
wept) and painting black lines onto those
before glueing them on as part of the
headband.
And that's it !
