


|
Started |
: |
October, ?? 2004 |
|
Finished |
: |
October 26th, 2004 |
|
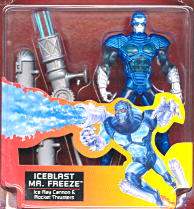
Base |
: |
Iceblast |
|
Parts |
: |
Internal action feature |
|
Materials |
: |
"Fimo" Citadel Paint,
Efa Plast |


Character & Intent
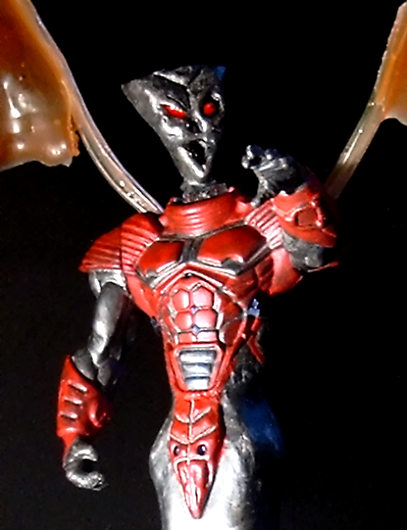
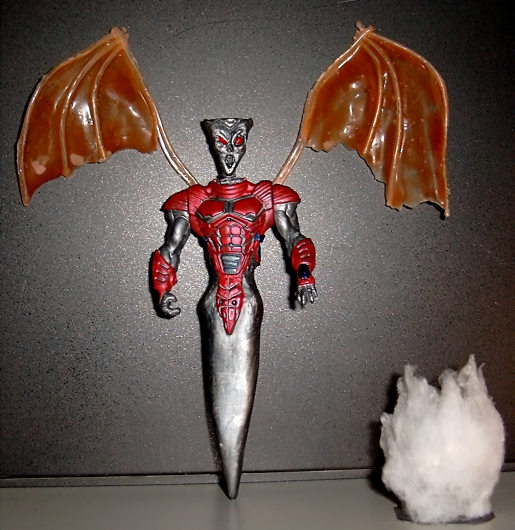
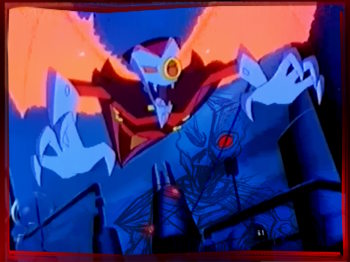
A robot vampire. Could anything beat a concept like this
?
Surely, but it's still pretty damn good.
It should come as no surprise to anyone that the enigmatic
N0S-4-A2 is one of my favorite BLOSC villains. In
addition to that, it has lots of design tweaking potential.
What I have done here is just one option - And certainly
not the best one. I would've liked the head to have come
out a little more scary and skull-like. Nonetheless, I'm
still satisfied with the final result... And the fact that
another "Batman and Robin" movie figure has
thus ceased to exist.
Creation
After ridding Freeze of his hideous head and legs as well as
cooling
the water-burns on my hands, I proceded to tackle the head issue.
Obviously, I needed to sculpt the whole thing, so attaching it
was a problem.
In the end, I sculpted the head around one of my trusty ALs,
while inserting
some peg-like stuff found on the inside of some old WCW figure's
action
feature into the body and glued it all together in the end.
To handle the conic lower section of the body, I first
drilled a hole into
Freeze's crotch (Ahnold can't suffer enough !) and then glued a
kebab
skewer into the hole. Then, I sculpted a fitting cone out of Efa
Plast
and let it cure just a little, only to impale it on the
aforementioned
skewer. Followingly, I sculpted around the seam to smoothen
things out and shape them up, of course. Also, I added the...
Uh... Whatever it is that decorates the crotch area.
The blue decorations in the hip area are rubber bands, glued into place.
The wings were some challenge. As N0S-4-A2 uses energy wings
(which is sort of an odd choice for someone who's constantly
running
on low batteries), they had to be orange and transparent.
Fortunately,
that's exactly how what liquid latex looks like when it cures.
However,
I still needed a stable basis for the wings. Fortunately, I had
purchased
some of ... uh... those plastic string thingies kids tie knots into
for no
apparent reason nowadays. I figured they would be perfect for
several
customizing projects, and it seems that I was right. I cut a few
pieces
into the needed lenghty and then filled them with some wire. Then,
I glued the pieces together and applied liquid latex in between.
Then, I drilled fitting holes for the wings into the back of
the figure.
But before I glued them into place, I applied primer, paint
and finish
to the figure, in order not to soil the wings. Once again, I can
only
praise Citadel Paint.
Finally, the misty stand was a fairly easy thing to make. All it
took
was half a Kinder Surprise plastic egg, which I cut a fitting
hole into.
The edges of which were covered with a layer of glue and then
liguid
latex to make sure the figure would fit in snuggly without scraping
of the
paint. Then, I glued the egg onto a piece of figure carding bubble to
add
stabilty. Finally, I painted the entire thing, glued some cotton
batting onto
it and sprayed it with clear finish to fix the entire thing.
There you have it. The making of a robotic monster.
