

|
Started |
: |
Dezember 18th, 2006 |
|
Finished |
: |
January 22th, 2007 |
|
Base |
: |
|
|
Parts |
: |
Marvel
Legends |
|
Materials |
: |
Apoxy Sculpt, Glues, |
|
Points of |
: |
~ 36 |
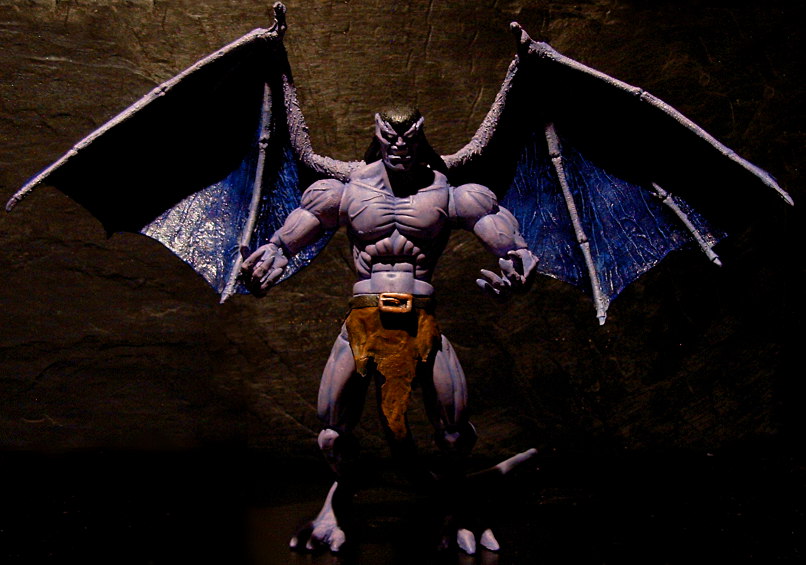
Character & Intent
1000
years ago, superstition and the sword ruled.
It was a time of darkness. It was a world of fear.
It's the age of Gargoyles.
If those words hold any meaning to you, I most likely
won't
have to say much more. Indeed, Gargoyles qualifies as one of
the best animated series of the 90s, if not of all time. The saga
of the noble inhuman protectors from medival scottland finding
themselves re-awoken in modern New York - A world that is
not
as barren of myths and sorcery as it might seem on the surface.
And no-one would deny that the focus of the series clearly rested
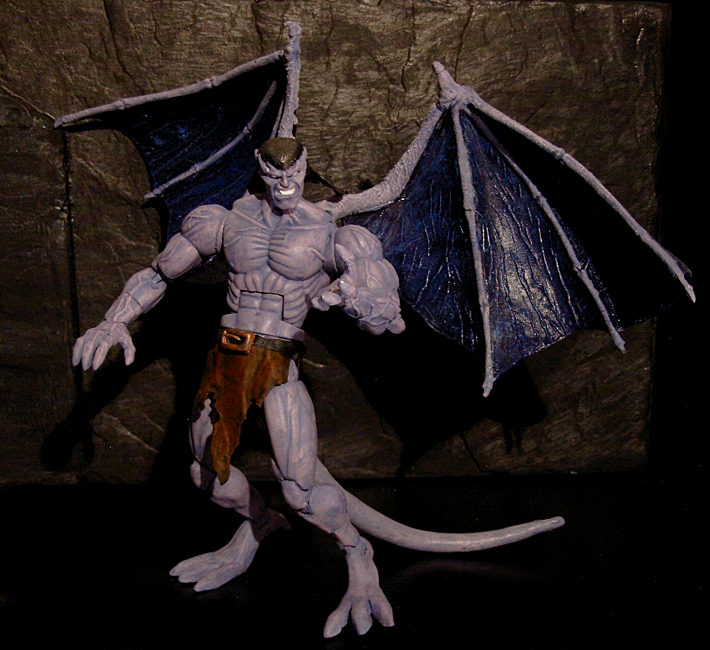
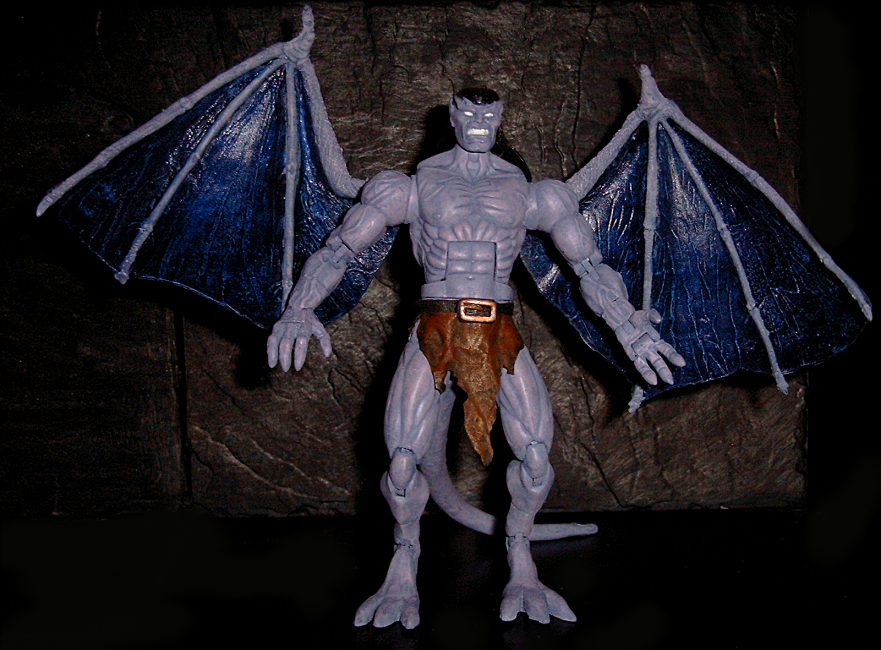
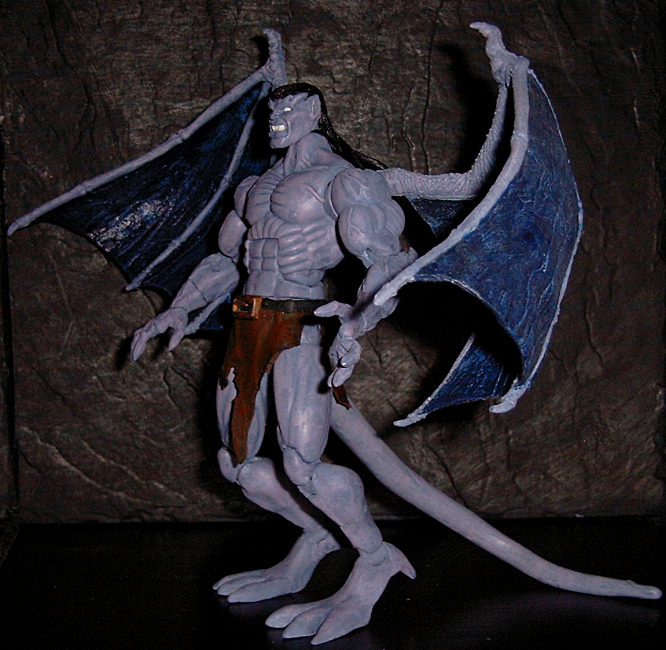
on the strongest and most noble of the Gargoyles - Goliath.
Naturally, I have always been a fan of the series. So when
I one day
looked at the face of Marvel Legends Omega Red, I just had to
take
advantageof certain similarities that presented themselves.
The results are actually pleasing to me this time. As of the time
of this
writing, Goliath is probably my favorite self-made custom of all.
Creation
As most before it, this custom gave me a chance to try some
things
out for the first time - In this case, it was the simple "Swap
limbs
at the joint pin" method, which I hadn't been able to use on any
of
my projects before. The process turned out to be pleasantly easy.
As you can see from the stats box above, Omega Red's forearms and
calves made way for those of Blackheart. Those parts appeared the
only logical
solution due to shape and size. Fortunately enough, they turned out
to be quite
compatible even with the clicking joints.
The actual challenge in making those parts work was their surface
- It was highly
textured and bumpy. I really liked this concept for Blackheart, but
it just wouldn't
work for Goliath. The solution was simply, but tedious: Cut and
sand the biggest
bumps down and sculpt a new surface over the entire limbs. This also
added some
more bulk to them, which was a further help in making the parts fit
together on the
antomical level. I also closed up the fingertips (going from
fingernails to the skin-covered
Gargoyle talon-fingers) and added the typical protusions to the
elbows and heels. I also
sculpted over the entire feet, as I had glued the toe
articulation stiff. This was necessary
to support the added weight of the wings.
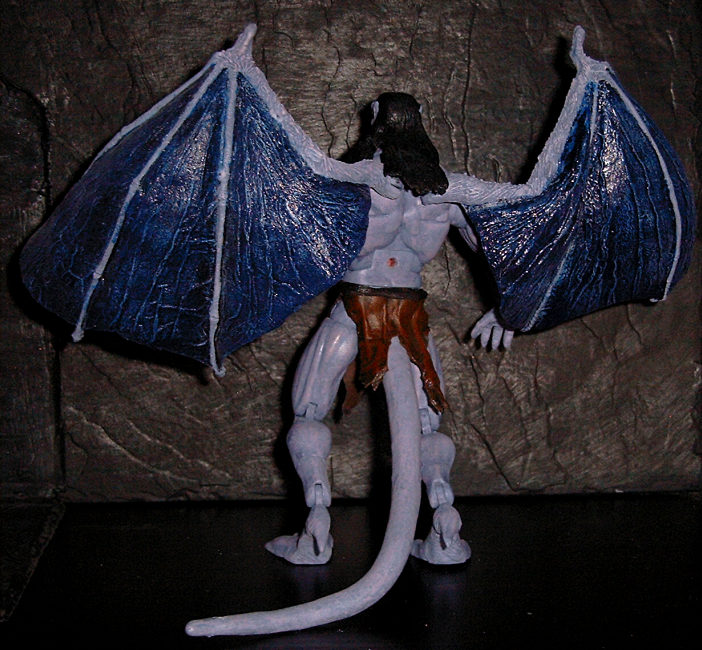
Speaking of the wings....
They required some extra fitting work. After an unsuccessful attempt
of outfitting them with
Lego Bionicle balljoints (which just couldn't support the weight),
I chose the wing joints of a
Mega Bloks dragon. The original pegs of the wings were cut off and
replaced via glue and
plastic skewers inserted for extra strength of the bond. I chose to
sculpt over the seems with
some Apoxy Sculpt, which surprisingly left very little of a visible
seam.
To connect the wings to the body, I simply cut the female
connector part from the dragon's back
with a dremel cutting disc, cut appropriate holes into the torso, and
inserted the connector
with (a lot) more glue. Once again, the seams were sculpted
over.
However, this was not to remain the only sculpting done on the
torso. For reasons I simply can't
imagine, Omega Red seemed not to possess any collar bones whatsoever
(A phenomenon found
in various Marvel Legends figures, by the way). Now, usually, this
wouldn't bother me all that much...
But on a bare-chested humanoid being with WINGS, it made my (actually
quite limited) anatomical
knowledge rebell fiercely. So I added this little detail as
well as thicker trapezius muscles for a better
visual flow.
Further work on the torso - Albeit practically on the opposite end
- lay in adding a connector for
Blackheart's tail. This turned out to be easy enough, as I found a
Lego piece that would work as
a simple peg compatible with holes I could easily dremel into
both parts. However, as I glued this
part into place, some glue distributed itself inside of the hip and
ended up getting the right balljoint
stuck entirely. Due to the extraordinarily strong bond provided by
Pattex Blitz Plastic glue, all my
attempts at loosening it up again failed. My only option was to
violently rip it out and replace it
a joing from Blackheart. This part, in turn, prove to be incompatible
with Omega Red's leg, so
I had to cut the pegs off of both joints and glue the peg from
the Red one onto the Black one.
(Funny how perfectly descriptive the characters' names are here).
Some additional gap-filling
on the hip with apoxy sculpt finally concluded this annoying
incident.
However, the work on the tail was not quite done yet. No matter
how much I would sand it down,
much of the original texture would always remain. After much thought,
I found a surprisingly
easy and workable solution for this problem. I mixed a thick
paste of liquid latex, acrylic
paint transparency paste (a material I have found to make
liquid latex thicker and less elastic,
much like the soft plastic found in capes and such) and some paint
and brushed it onto
the tail in thick layers. This covered all the remaining texture and
resulted in a smooth
surface with just the right ammount of give to retain the tail's
bendy properties.
Remaining in this area of the body (creeped out yet ?),
I also developed a new method to
create a convincing loincloth that wouldn't required any sculpting.
I glued some simple paper
tissue onto aluminum foil and cut and bent the it into the general
shape I wanted the loin-
cloth to assume. Then, I stabilized the shape with hot glue
applied to the backside. In the
next step, I put a good ammount of talcum power onto the front
(to avoid unwanted
adherence) and pressed it into a slab of Fimo sculpting compound.
After hardening
the Fimo, I now had a negative one-piece mold (or rather two;
one for each side)
with all the realistic tiny cloth wrinkles and texture I needed. All
I needed to do then
was to pour some liquid latex with a bit of brown paint into the mold
and let it dry.
Instant loincloth !
The belt was made by pouring liquid latex (with black paint,
obviously) onto a
surface I found to resemble the texture of leather. The belt
buckle was sculpted
seperately. All these parts were seperately painted and glued on
after the painting
stage was complete.
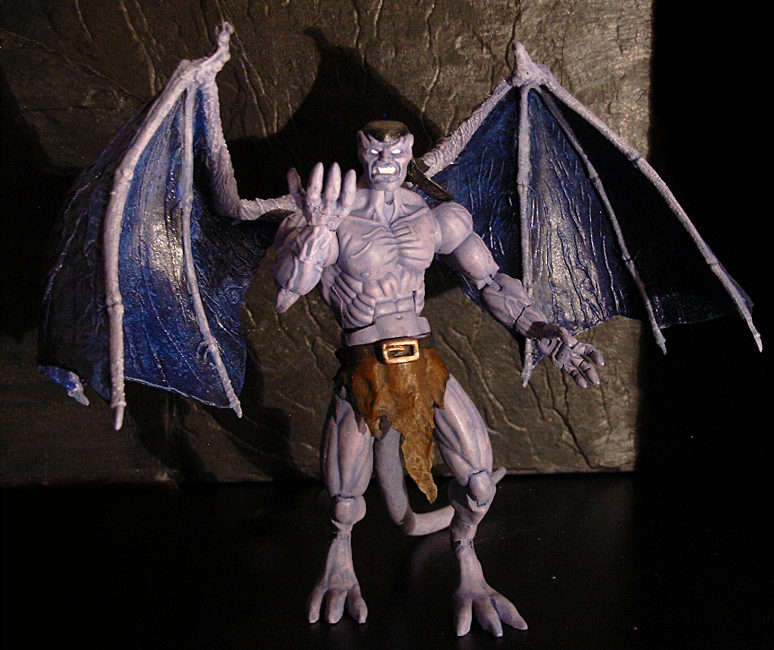
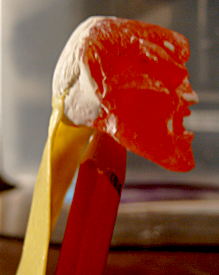
And finally, to bring this writeup full circle, the head. It
was made using my
usual method: Take a cast in ceramics, do a lot of carving and
sculpting,
make a cast of this in synthetic resin and do some more corrective
sculpting.
At this point, I have to thank my friends known online as
Spotted Cobalt and
RedfireManiac for their input on the headsculpt, as they
really helped in improving
the likeness. Thank you, guys
! I wouldn't know what to do without you.
As for the hair, I used a multi-step approach. I put the
basic shape on the head
itself down with Apoxy Sculpt and sculpted the long part in the back
(ever noticed
that Goliath did the impossible in making a mullet work ?) seperately
using B-Yellow.
Then, I glued the long part into place and sculpted over the top
with some more
basic Apoxy to create an inseperatable unit.
Finally, unless I have forgotten anything, the paintjob turned out
to be somewhat long
and tedious due to Goliath's rather unorthodox skintone, which
required several layers
of washes and brushes until I had it down closely enough. In
this context, I can really
recommend mixing some of the aforementioned transparency paste in
with your brushing
(or to use transparent paint to begin with). It creates a much
smoother flow of colors.
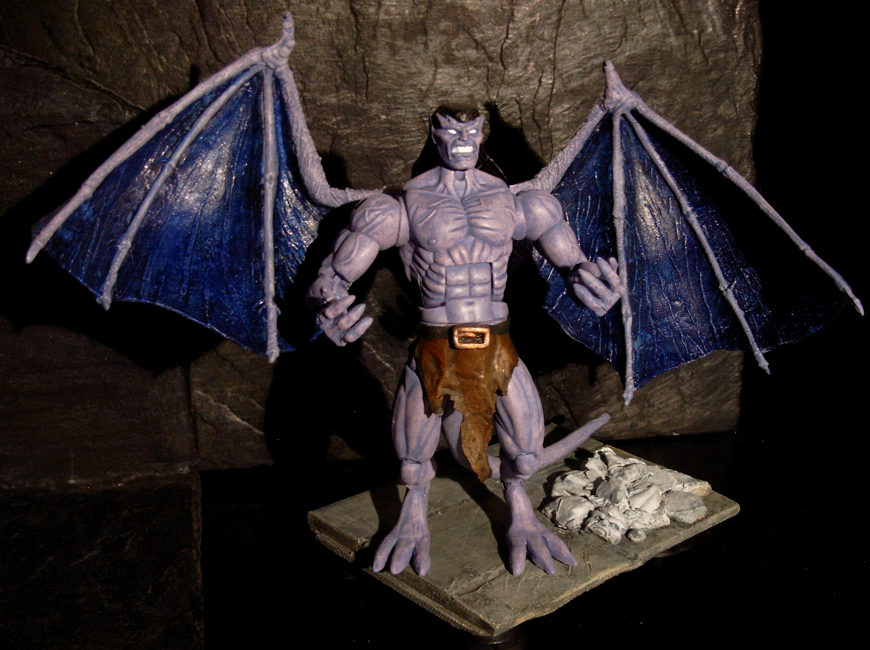
Was there something else ? Oh right, the display base. As you
can probably see, it's nothing
special. Just a piece of wood, into which I dremeled a few lines
to simulate a floor made of
large stone tiles. The pile of shedded stone husk obviously consists
of ceramic casts of several
body parts taken before painting and glued together on the base.
And that is all there is to my new favorite custom of mine !
Doooooo doodoo_doodoo_doooooo doodoodooooo
Doooo doodoo_doodoo dooo dooo dooooo....
Come on, you were humming it, too !
Or at least thinking it.

(To main)