

|
Started |
: |
November 18th, 2003 |
|
Finished |
: |
December 12th, 2003 |
|
Base |
: |
The Kingpin |
|
Parts |
: |
Movie Ahnold Freeze's |
|
Materials |
: |
Revell paint, "Das
Pronto", "Eva |

Character & Intent
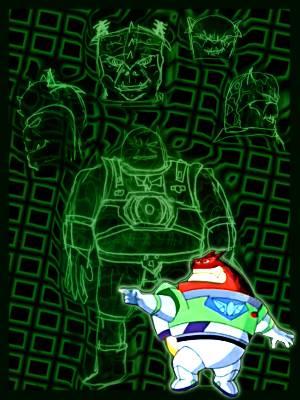
Ah, yes... Booster. Your typical
"Loveable oaf", adjusted for Team Lightyear.
Of course, there had a few alterations made
for my less-cartoony version. Most useful
things Booster ever did in the animated series
involved stitting down on someone. You know,
because he's huge. Haha. Yeah. The way to
make him a little less of an embarassement to
his team and star command as a whole, is
them youngins call a no-brainer:
Make him a powerhouse.
My idea is to make him a (more or less)
humanoid ram. His job would be to bash
through walls (or enemies) whereever
their weapons can't be used.
For his personality, I envision him to be
a bit more of a fighter, a warrior,
wearing the Star Command symbol
on his dented chestplate with
true pride.
Creation
This custom started off unusual enough:
With a blob of hot glue on a ball of toilet
paper. Hey, come back, I meant real
glue !
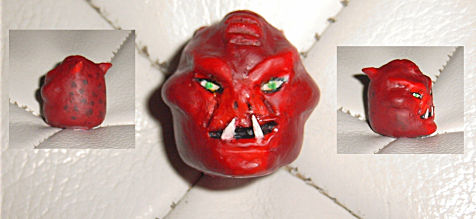
This was my base to sculpt the head around -
Sure I could've sculpted it out of a solid
chunk of fimo, but I'm on a tight budget
and don't like to waste anything,
anyway.
While sculpting, I've payed special
attention to give booster all the essentials
of skull anatomy - Eye sockets, cheek bones,
a chin and so forth. He is an alien, but he
is still humanoid. It should also be noted
that I sculpted and baked the horn-like
appendices on the back of his head be-
fore hand and integrated them while sculpting
the rest. After I had oven-hardened the
head itself, I applied a careful inkwash
to bring out the details before the actual
paintjob. His "tusks", however, are
not sculpted, but bottle cap cuttings
glued on after most of the paint
was done.

Not all too bad for a first headsculpt, don't you think ?
The real work was still lying before me.
No, actually, it was standing on a shelf:
Kingpin in all his ripped-from-animaton, bloated glory.
What I had considered a fairly easy task at first, soon
turned out to be a real test of my miniscule skills:
Removing all of the Kingpin's details and sculpting
all of Booster's.
The first problem I ran into was the Kingpin's material.
Unlike most other figures, his massive form was made
of rather hard plastic which created a lot of unhealthy
dust while dremeling. It got to the point where I was
forced to do this part outside of the house in the
literaly freezing cold, carefully catching as much
of the waste as possible in a plastic box in order
not to kill anything out there.
That deed done - And it took longer than it
sounds like - I drilled four holes into the back
of the figure to attach the rockets. Technically,
they're still removable, but without them,
the figure has four holes in it's back.
Those rocket's however, created a new problem:
While the figure was never too fond of standing up-
right, it now completely refused to do anything but
topple over and lie around. Solution ? A lot of
"Das Pronto" around the boots... Well actually,
those weren't even boots before.
Sculpting all of the armor on his arms and torso
wasn't easy, and I had to do it twice for the most
part. Most of the outer lining was made of "Kids
Dough" clay at first, but that stuff oddly shriveled
and got cracky as it hardened. Odd, it never
did that before. So off with it and time to
re-sculpt, this time using a little of "Das Pronto"
and lots of "Efa Plast". If you compare the base
with the finished custom, you might notice that
I've also re-sculpted to bottom of his torso
to be a bit more rounded. Not because
I thought Booster needed some action,
but because it just looked as natural
as a robot made out of a barrel.
His arm- and shinguards also require
special notice - Those were partially
done with Fimo, since I had (forcefully) taken
the arms off at some early point. Other parts
of them were made with "Efa Plast", but
taken off for painting. Okay, "taken" is not
quite the right word. I think "dropped off
like dead fleas" would be more fitting.
No grief over that - It made painting
much easier.
Things that were not sculpted are
the red square on his belt buckle,
the button on the left side of his
chest and the silver squares on
his shoulder straps.
The head was put into place by glueing
a short piece of pencil into the neck socket
and drilling a corresponding hole into the
the underside of the head. This method
was already tested by that time, since
I had previously given the very same
Kingpin figure some head articulation
this way.
The Star Command symbol is, of course,
a mere printout, decoupaged in place.
The rest was a pretty complicated
paintjob. Complicated because
I had to do it twice, as well.
You see, this figure was the one that finaly
made me realize that white (and only white)
revell paint and belton vision finish don't
mix well. Lots of cracks had to be sanded,
lots of paint re-applied.
While the final result isn't exactly the prettiest
or most articulated figure I have, it's certainly
satisfying to have one where all the details
are strictly my work. I like it. ![]()