

|
Started |
: |
March 15th, 2004 |
|
Finished |
: |
April 1st, 2004 |
|
Base |
: |
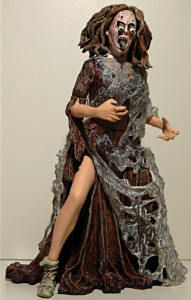
The
Crone |
|
Parts |
: |
Movie Maniacs |
|
Materials |
: |
Revell paint,
marabu paint, |
|
Points of |
: |
8 |
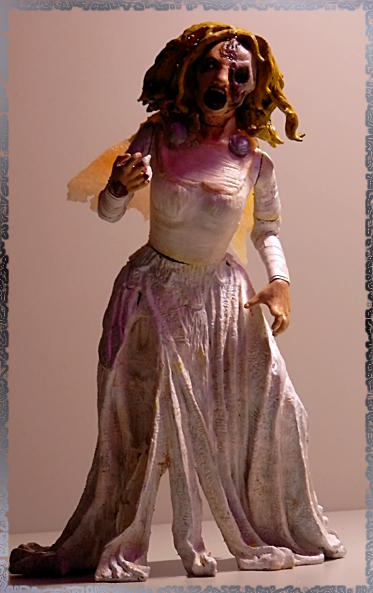
Character & Intent
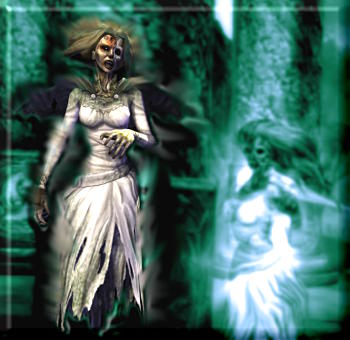
I had never been all too happy with my previous
Ariel custom, as it turned out a little too cartoony
for my tastes. Then, Legacy of Kain: Defiance
was released and featured an almost entirely new
design for this intriguing character. At that point,
it was merely a matter of finding the right base
to me.
If found McFarlane's take at The Crone from
"Sleepy Hollow" to be the most appropriate
one. Unfortunately, my skills were not quite
as adequat, so apart from the liberties I had
to take with her dress due to the base,
I seriously screwed up on the likeness.
Oh well, it's still an okay custom consi-
dering the level I'm working at.
Creation
First of all, I carefully pulled out all the "veils"
that were attached to the figure. Most certainly,
those will come in handy sometime.
Next up, I pulled the hair part off, leaving
me with half a head, which I took off via
boil&pop to work on it seperately.
Removing the snakes-action feature went
just as easily.But how am I ever going to
use three snakes with two of them holding
eyeballs ? Unless American Eyedol is
casting again, of course. One more for
the big book of awful puns, folks !
A huge, huge step in the making of this custom
was cutting, dremeling and sanding the lower
body. I was wrestling with myself of work to
be done on this part, but in the end, I went for
the easier route of cheating the hell out of
the original design. It was still a lot of tedious
work, though.
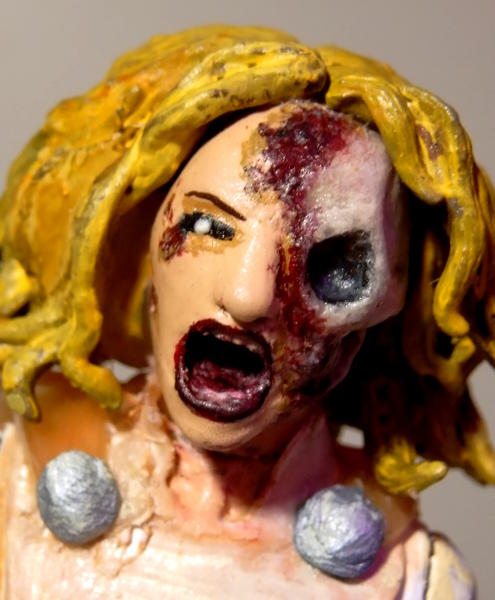
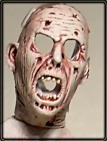
The head had it's own challenges.
First of all, there were three gaping holes where
the eyes and mouth snakes used to be. Then,
there was the problem of the face looking differently
decomposed from what I was aiming for. Oh, yeah
and the fact that half of it needed to become a
friggin' skull. But have a look at it, yourself:
I started off by filling the gap on the right eye
(left of the picture) as well as the mouth with
some Fimo, putting my miniscule sculpting
skills to the use. Then I took a seperate cast
from a skull I found apropriate enough on a Movie
Maniacs poster display base on ausing the same material
and baked both. This left me with the leisure of having
the skull cast ready as well as not having to worry about
easily destroying the finished parts of the face by acident.
I violently expanded the eye hole on the other side of
the face and then pushed a glob of Fimo through it.
Then, I simply pressed the skull cast onto the glob.
It took me several attempts before I got it to look the
way I wanted. Then, I sculpted all over the seams
(including the entire jaw portion of the skull), also
correcting the skull shape a little in the process.
Another thing that needed to be sculpted was
the nose, as it didn't look like Ariel's at all.
Not like my final result does, but at least I tried.
After another quick trip to the oven, I sanded out
all seams left as well as the various obsolete folds
on the "fleshy" half.
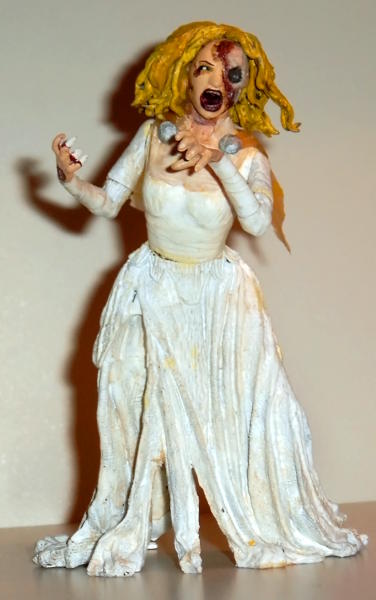
Time for the face's paintjob ! And when I say
"time" I mean a lot of it. It took me many, many
attempts to get the paint job on this one right.
See the thick nose ? I didn't sculpt it that thick.
It's too much paint, folks !
It managed to use that to my advantage, as
well, though. The thickness allowed me to
carve some structure into the decayed
parts, using a needle. After that, I used
several shades of red and brown to accentuate
the wounds.Of course I also drybrushed the
skull with a few layers of white/grey/yellow
mixes to make it look a little more "livelike".
The hair was painted seperately with a few
layers yellowish shades of marabu as well
as acrylic paint.
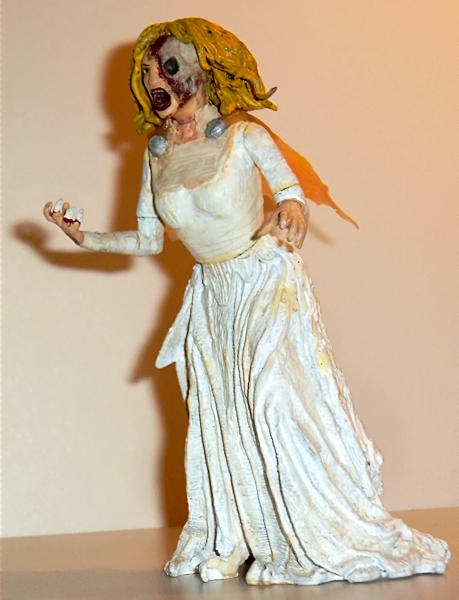
The work left to be done on the body prove
be a bit easier, albeit still a challenge.
Obviously, the gaps left by the veil attachments
needed to be filled, so I used some Efa Plast to
sculpt the ridges of the dress in those spots.
More of the same was used for.... well, what-
ever it is around her neck and on her chest.
The wrapped parts of the dress are no more
then insolation tape. I used Revell Contacta
Liquid glue to apply it, as it "melts" the plastic
a little bit on the surface and therefore guaran-
teed a tight fit. The neck collar is made of
cut pieces of latex, incorperated into the
sculpting.
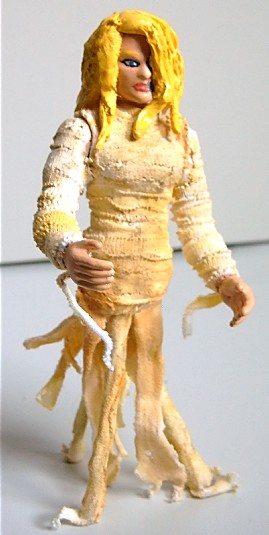
The base coat of the dresses paint is white
acrylic paint, later on both washed and dry-
brushed with several mixed layers of white,
yellow and brown to make it look withered
and aged.
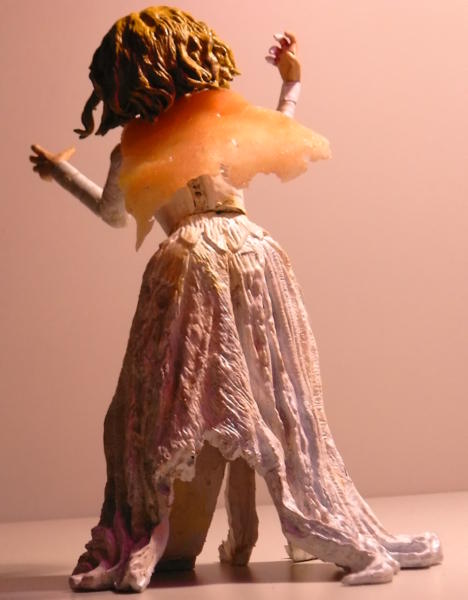
The translucent cape is made from liquid latex,
which I simply poured onto a flat surface and cut
into shape after it had dried. It was glued in
place after the dress had been painted. The
buttons are Kids Dough Clay painted silver.
There you have it !
Ariel.... or almost.

(To main)